Upload your first medical report
Add a PDF or photo, find the processed report, and check the extracted information against the original.
By Lifexam Editorial
AvailabilityFreeDescribes features available on the Free plan. All resources are free to read.
On this page
Choose one report you already have: a PDF downloaded from a patient portal or a clear photo of a printed page. Keep the original open or nearby. Once Lifexam has processed the document, you'll use it to check the extracted information.
Manual upload is available on Free and Plus. You need an available Document slot. The ordinary Free plan includes five slots and one Profile; Plus includes 100 slots shared across the account and ten Profiles. Compare the plans.
1. Open Add document
Sign in and choose Add document. On a phone, the control appears as a plus button in the top bar. You can also reach your uploaded files through Documents.
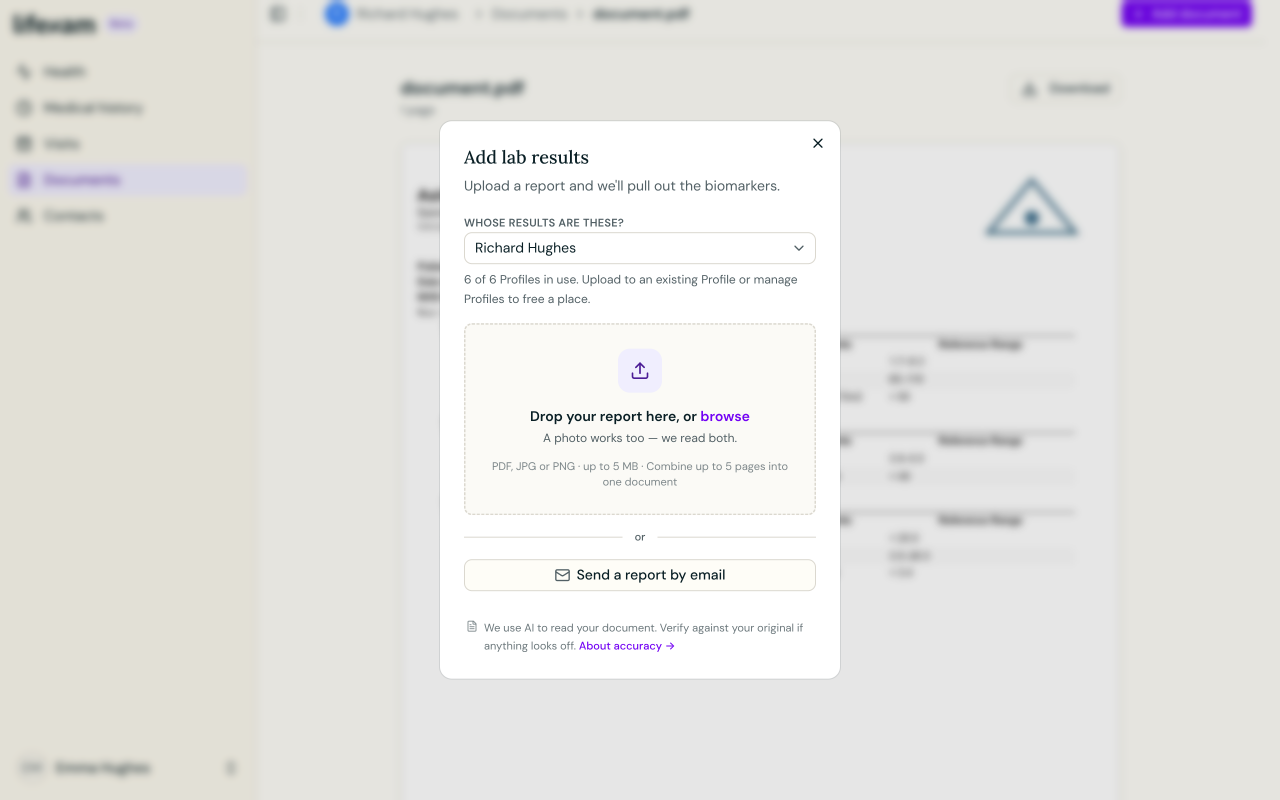
If you manage multiple Profiles, check whose record is selected before choosing a file. Multiple Profiles are a Plus feature under the ordinary plans. With Free, uploads go to your own single Profile.
2. Choose a PDF or photo
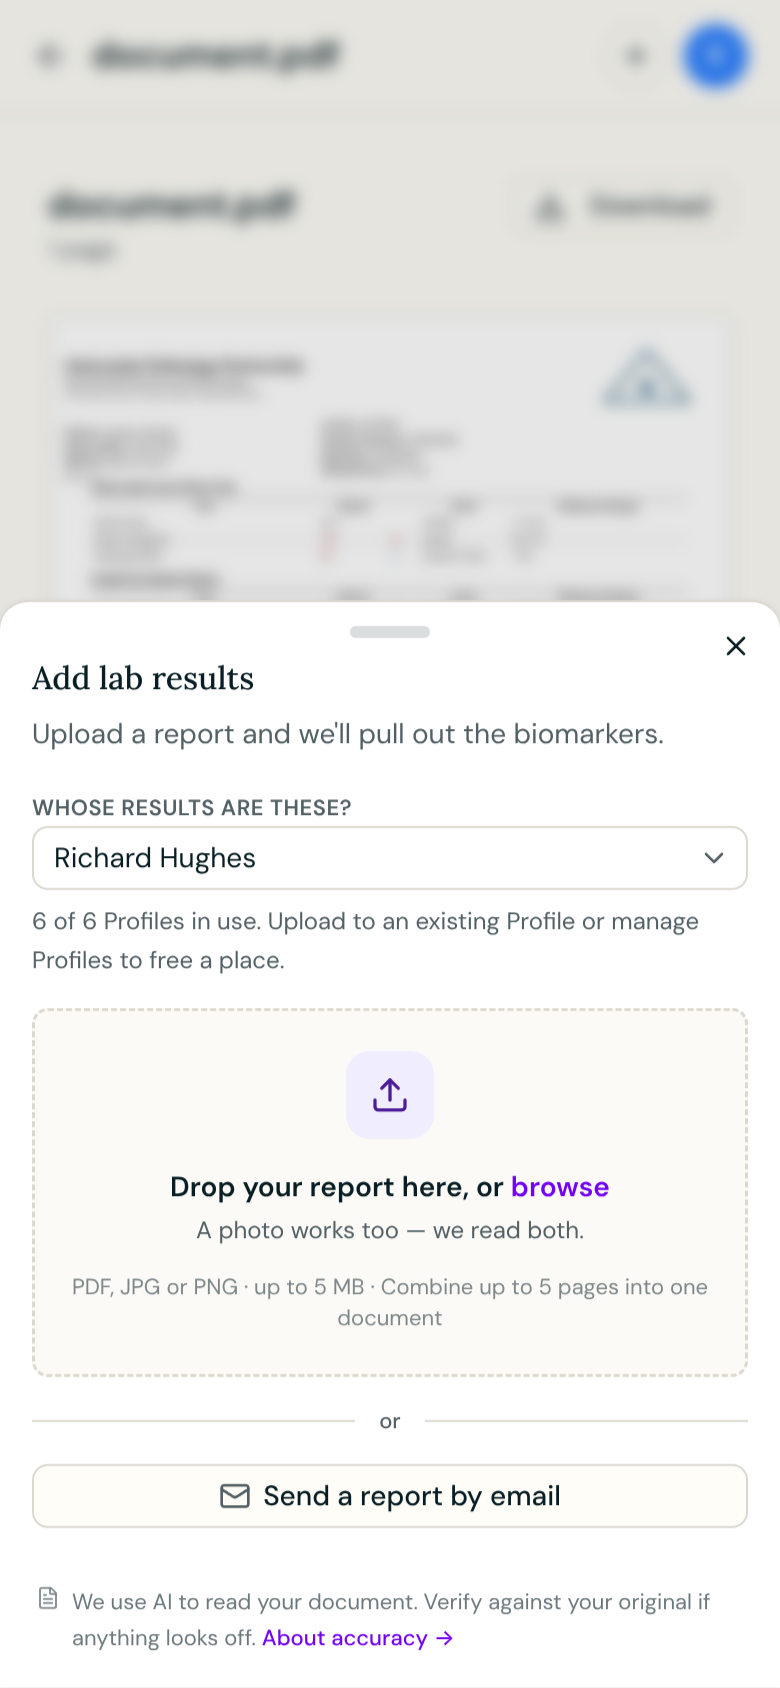
Drop the file into the upload area, or choose browse and select it from your device. Lifexam accepts PDF, JPG and PNG files. Check the size and page limits displayed in the dialog before selecting a large file or several photos.
For a photo, make sure you can read the patient's details, report date, values, units and reference ranges. Include the edges of the page so information near a margin isn't cut off.
A single selected file can start uploading immediately. Check the Profile first; don't assume there will be another confirmation screen after the file picker.
If you are adding several photos of one report, select them in page order. Lifexam can combine the images into one Document. A PDF cannot be combined with photos in the same set.
3. Let the document finish processing
After the file uploads, Lifexam reads the document and extracts information from it. Wait for processing to finish before checking the result. The time needed can vary with the document; an upload arriving successfully isn't the same as extraction being complete.
You can find the file through Documents. When it's ready, open its report to inspect what was extracted.
4. Compare the results with the original
For a lab report, check the marker names, values, units and printed reference ranges. Check the report date too, especially if you're adding an older document.
Choose View original from the report to return to the uploaded page. Compare any unexpected result with what is actually printed there. A high or low flag describes the recorded result against its reference range; it doesn't tell you the cause.
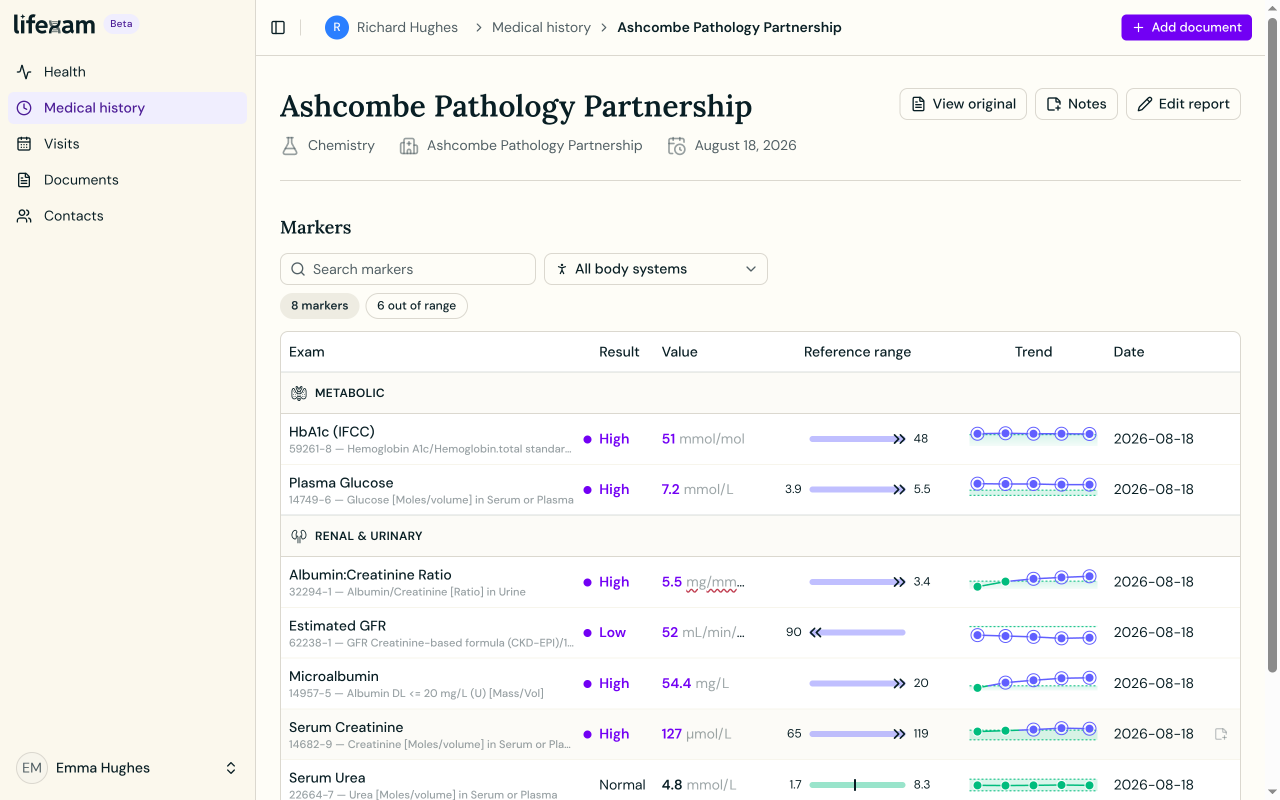
If an extracted value differs from the original, use the report's editing controls to correct it. Keep the printed value, unit and range together when checking a result. An AI extraction mistake is different from a question about what the lab result means; discuss the latter with your clinician.
5. Find it again
Use Documents when you want the uploaded file. Use Medical history when you want to find a report by its clinical date. An older report belongs with that earlier history, even if you uploaded it today.
Before adding another document, check that the first one belongs to the intended person and that you can open its original. Those two checks make it easier to spot a misplaced report or an extraction error while the source is still in front of you.